
How to access the database
You can access the deployment’s database in read‑only mode to develop add‑ons or build reports.
Database access is only available on non-production deployments.
Before you begin
Install these tools on your workstation:
Enable database access
You must enable the feature on the deployment before connecting:
- Open the deployment detail page in the X3 Cloud portal.
-
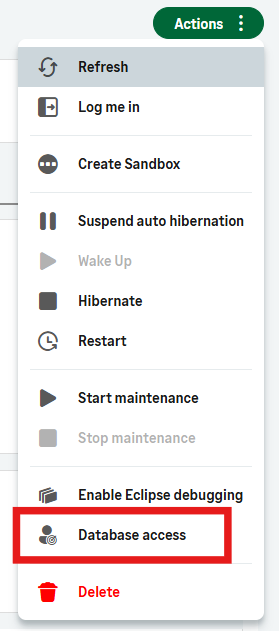
Open the Actions menu icon and select Database access.

-
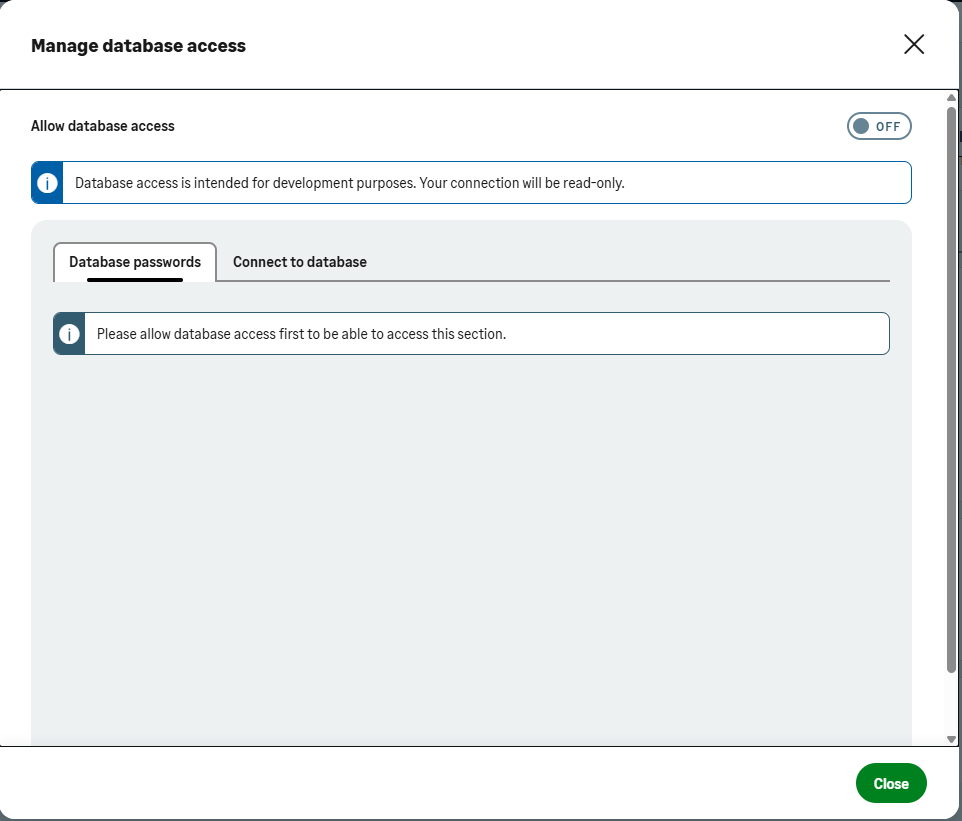
Activate the Allow database access toggle.

Manage database users
Manage passwords
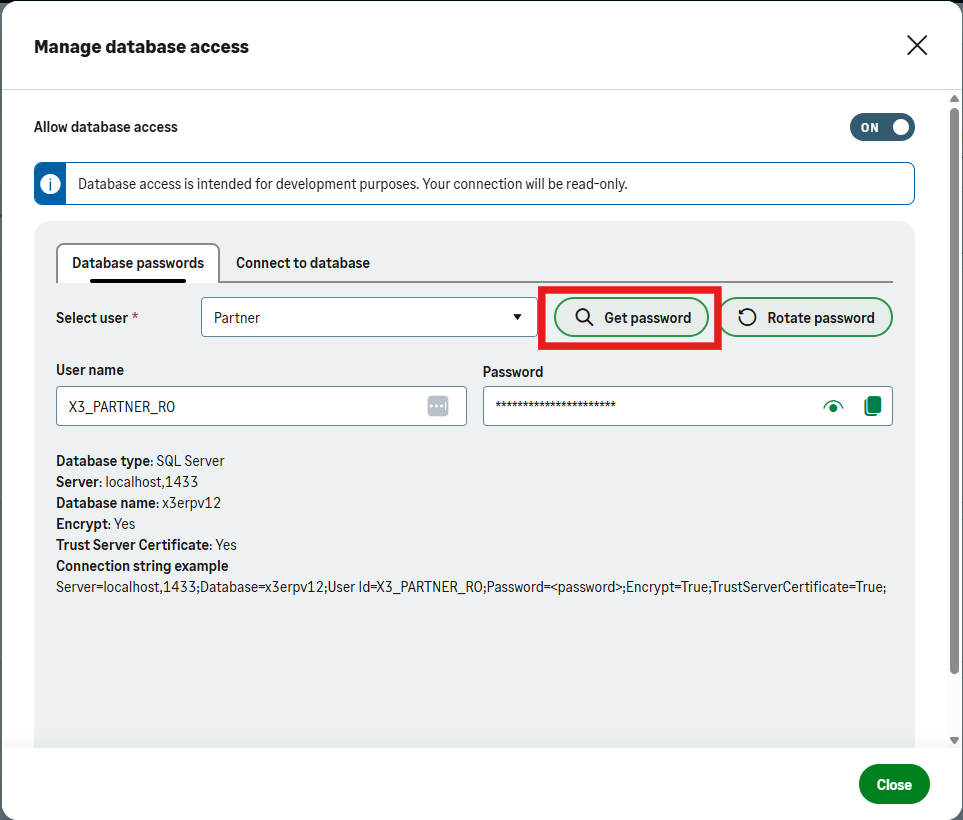
Fetch a current password
Use this function to display the current password for this account.
-
Select Partner or Customer.
-
Select Get password.

-
Copy and save the password.
Rotate a password
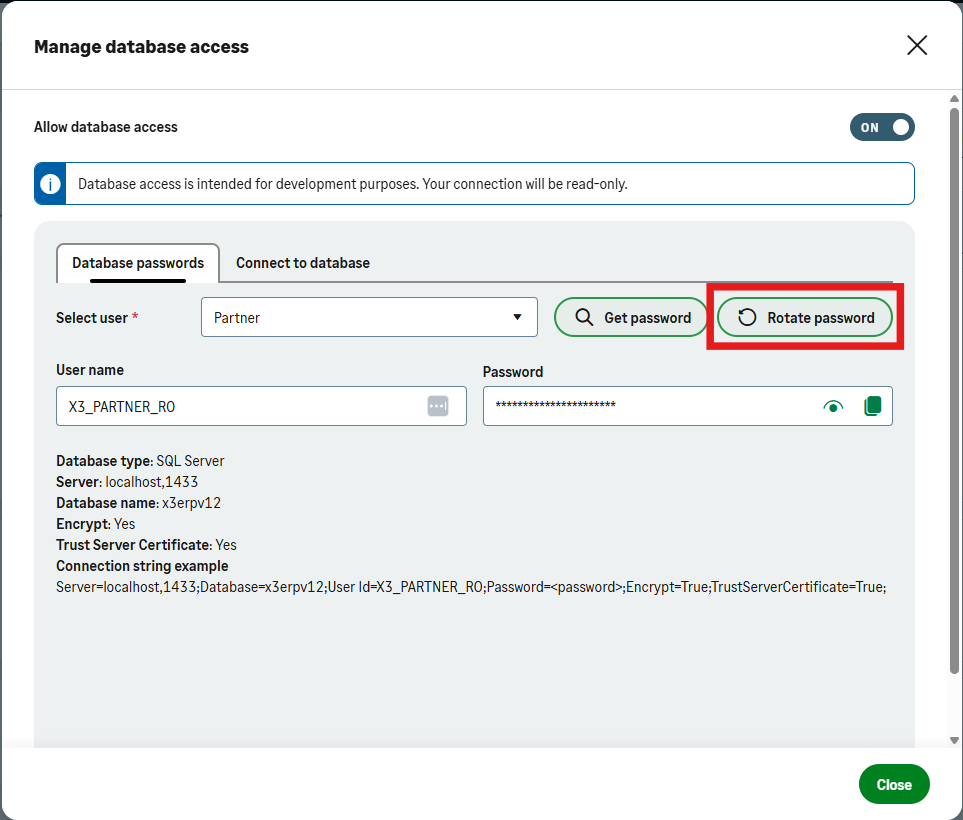
Use this function to ask for a new password for this account.
-
Select Partner or Customer.
-
Select Rotate password.

-
A confirmation window opens. Select Yes.
-
The rotation will take a few minutes to come into effect. You can check the progress of the password rotation in the Operations tab.
Connect to the database
When you have the password, you can connect to the database:
-
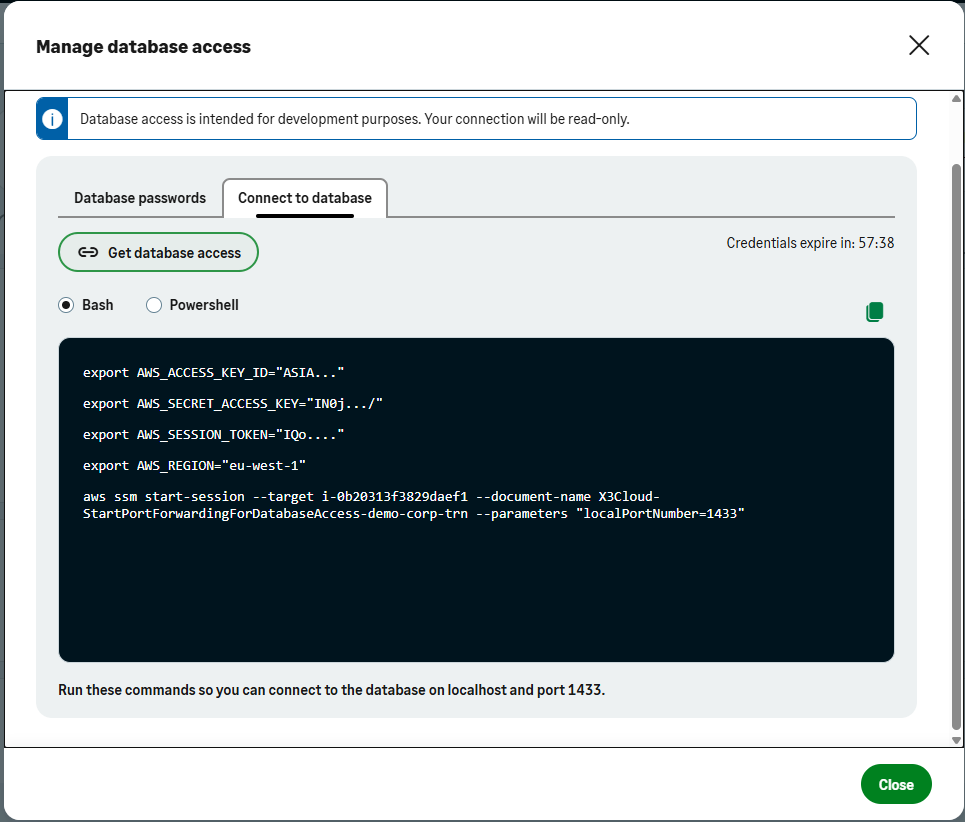
In the Connect to database tab, select Get database access. The portal generates the terminal commands required to open the secure session.
 Note:
Note:The portal automatically selects Bash or PowerShell based on your operating system. Bash is used on Linux and macOS, while PowerShell is used on Windows.
-
Copy the commands.
-
Open a terminal and paste the commands you copied from the portal.
-
Run the commands to start the secure connection.
-
Open your SQL tool.

-
Configure your SQL tool with:
-
Username
-
Password
-
Server
-
Port
-
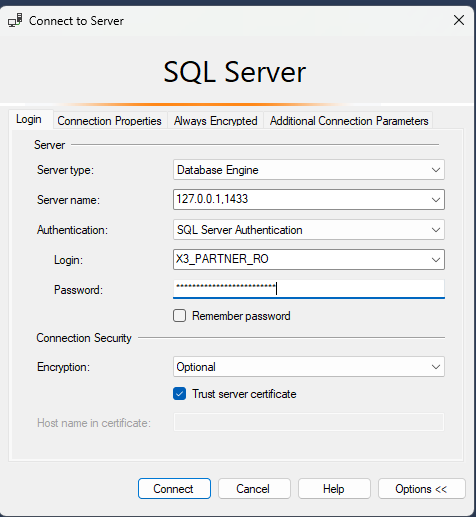
You are now connected to the database in read‑only mode.